The Lunchbox Lowdown #02
Carol Ann Cheah with more NY Resolution-friendly healthy grub

Intro
I‘m picking up where my fellow Editor Sophia left off last week. If you’re stuck in a sandwich/pie rut but you’re still aiming to pack lunches to keep your wallet and waistline in check, look East for some inspiration. The Japanese have long been the purveyors of colourful, varied and nutritious bentos (bento = packed lunch in Japanese) – and you don’t need to spend hours or make everything from scratch, as you can opt to use choice leftovers. Done right, you can streamline the cooking/assembly process into 20 minutes or less.
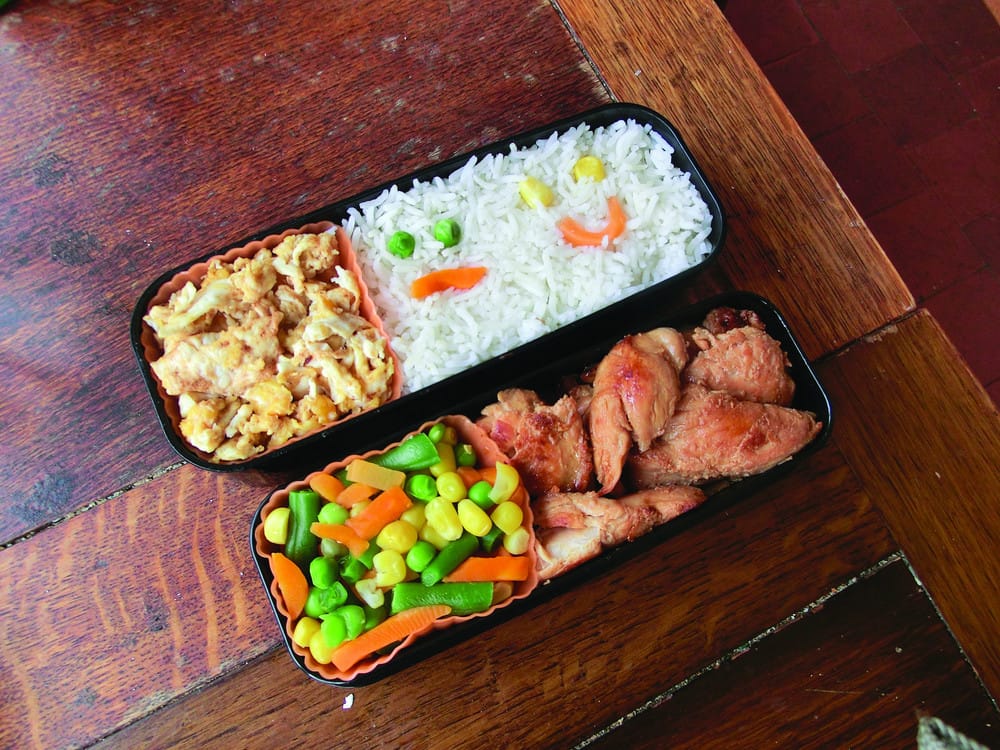
To the right is a bento I prepared some time ago, which I’ll deconstruct into its components below. This is what we’d call an Asian bento, mainly because the main carb component/staple here is rice. Of course, I’ve since been able to fit other grains in that slim Japanese bento box (namely couscous and quinoa) with other sides – the possibilities are endless.
Containers

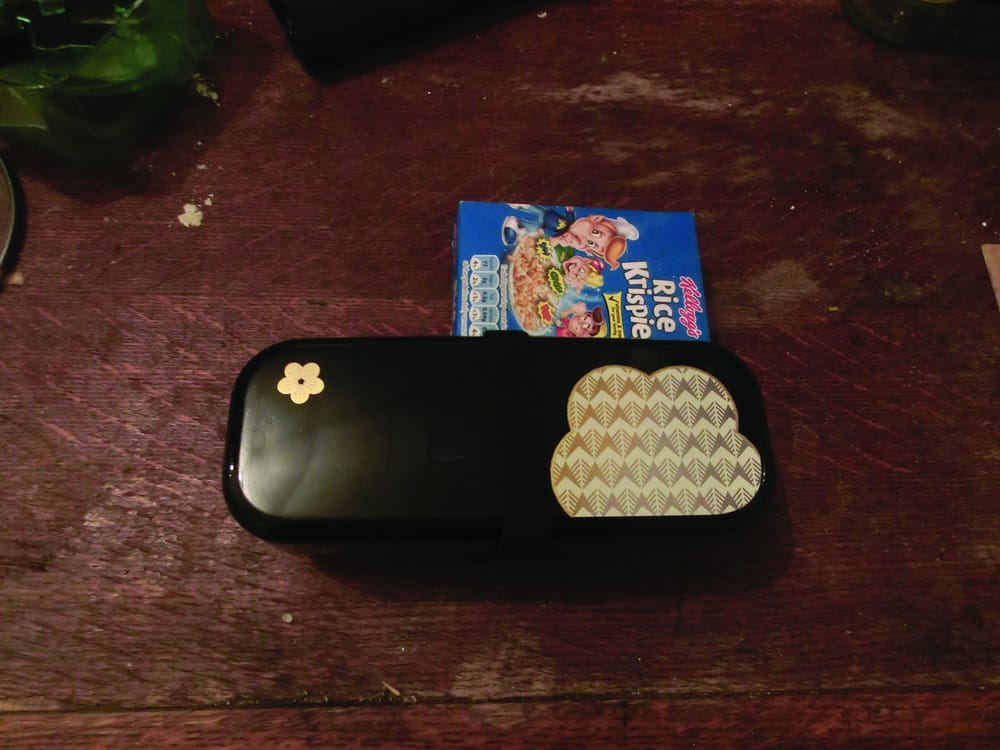
First, a disclaimer: proper Japanese bento boxes like the one on the right are NOT mandatory., even though I find they offer the advantage of being easier to pack (the box I have is approx 15cm x 6.5cm x 8cm in size with both tiers stacked). That said if you already have a decent inexpensive leak-proof container, you’re good to go.
Size does matter a bit (hah!) don’t be fooled by the small vessel, as packing the components in compactly means there’s less room for them to move and get messy during transit – so go smaller than usual. I find a 500-700ml capacity works best for most adults, but if you’ve got a hearty appetite (or your bento needs to be packed a little looser) then 900ml onwards works – please DON’T crush any poor salad leaves!
Containers without built-in dividers are far more flexible, as your side dishes may vary in sizes from meal to meal. You can easily use lettuce leaves, or silicone muffin cups like I’ve done above to keep different food flavours from mingling; but if built-in dividers are more your thing, go ahead.
A proper Japanese bento lunch is actually meant to be eaten at room temperature (gasp!), which is NOT a problem given our current cool weather, and assuming the proteins are fully cooked – no medium-rare steak bites, I’m afraid. But if you want your food above that temperature, you can look at thermal lunch containers if you don’t have a microwave, though they’re pricier and bulkier. Alternatively, just make sure your regular container’s nuke-friendly or pop it into an insulated lunch bag if it’s only going to be a few hours and you don’t mind it being scalding hot.
One thing I find about thermal containers: they’re perfect for soups (see our Lunchbox #01 issue), but not all foods stand up well in them – main reason being that food WILL carry on cooking in residual heat. You’d be fine with a stew or curry (or anything that’s fine with slow cooking), and maybe certain grains (rice!); but steamed veggies, pasta and certain meats will just look sorry, taste gooey and get bone dry respectively.
Editor’s Picks: Lock & Lock 550ml container, £6.64 from Amazon; Glit & Brillia Bento Lunchbox with Belts, £4.75 from japancentre.com
Carbs
Sure, the carb of choice for Asian bentos happens to be rice; but like mentioned before it doesn’t have to be. I’ve had bentos with couscous, braised potatoes and quinoa and they came out just as yummy. That said, if you’re using rice, you don’t have to wake up at the crack of dawn to prepare it. I alternate between setting the timer on my rice cooker the night before so I have fresh rice in the morning, or defrosting pre-cooked frozen rice in the microwave.
The Japanese (and myself) are partial to short grain rice that sticks a bit when cooked, but I’m not fussy – a decent basmati or jasmine rice works just as well. Whatever you do, don’t use the easy cook stuff; it isn’t as palatable whether hot or at room temp, and the extra time taken to prepare non-easy-cook rice pays off plenty in taste.
In the event you’ve scratched your head (or the bottom of pan) plenty of times while trying to cook rice, I’ve provided a method below – rice cooker optional. Remember the cardinal rule of Asians: don’t measure rice by weight;do it by volume. We usually use the small cups that come with rice cookers; but one regular coffee mug will cook up two hearty portions depending on your appetite.
Fluffy stovetop rice
Sayonara, Dr Ben’s! Measure rice as per the instructions in the “Carbs” section, depending on how many you’re serving or how many portions you’re planning on making ahead. We don’t advocate making a massive pot, though; a 4-person serving is much easier to control evenly during the cooking process.
Wash rice to remove excess starch and any nasties like talc that were used while processing, then drain and pop into a decent non-stick pan with a lid. Add water in a 1:(1.5-2) ratio, so for every 1 cup of rice you’re using about 1.5 to 2 cups of water. Stick it on the boil, then reduce heat to medium-low and let it simmer, covered. Resist the urge to stir because you’ll otherwise just destroy the rice and make it all mushy.
After 20-25 minutes (or until most of the water has been absorbed), take it off the heat (don’t take the lid off!) and let stand for 5-10 minutes ona damp tea towel. Fluff up with a fork, and then serve/pack into your bento box/portion up for freezing.
Protip: If you’ve got extra time to kill, feel free to soak the rice post-wash for about 30 minutes - this seems to make it fluffier and easier to separate. Drain, then add water and proceed as per directions.
Proteins
It’s funny, but in Asia leaner cuts like chicken breast sell for much cheaper than the slightly tougher but more flavoursome (and more in-demand) thigh/leg meat, which is the reverse of what chicken prices are like here in the UK. Asians have the last laugh though: darker meat tastes better at room temperature and can withstand reheating better withoutturning Sahara-esque, even sans the sinful skin.
Whatever cut you choose is totally up to you, though if you’re not using leftovers and will be prepping the meat dish in the morning, chances are you’ll be stir-frying it – so you need something that’s quick to cook but won’t dry out over time.
In that case, I find chicken leg/thigh, pork shoulder, or flank from beef (cut against the grain) work well. Just cut them into thin strips to save on cooking time. You can tenderize tougher and cheaper cuts than these if you prep them the night before in marinade – all you have to do in the morning is fry! Done right, you should only need perhaps 5-10 minutes to fry your meat, plus maybe a few more minutes to pack into your box and let cool.
If you plan on making a slow-cooked stew for dinner, why not make an extra portion seeing as it takes the same amount of effort? You can reheat, pop into your bento and serve it with your other side dishes. the next day.
Asian Stir-Fried (Shaoxing) Chicken
This is the recipe I used for the chicken in this bento. Well, it’s not so much a recipe as it was me throwing in a bunch of random seasonings with the meat in the spirit of true old Asian cooking when everything was done in pinches of X and splashes of Y. Experience and tasting your wares will mean you’ll get better with time.
1 chickenbreast/up to 2 de-boned chicken legs
Light soysauce
Sesameoil
Cornstarch
Shaoxing Wine - optional
Diced garlic - use however much you feel like
Cut your meat into thin strips, and bung them in a bowl with two tablespoons of light soy sauce, a drizzle of sesame oil, and a bit of cornstarch. Amounts can be adjusted – you can always add more! Leave to marinade overnight in the fridge, and in the morning, chuck them in a hot frying pan that’s already had about 2 tablespoons of oil and some chopped garlic in it. Stir-fry until almost cooked through (clearjuices + no trace of pink in the meat), deglaze with some Shaoxing wine (optional) and boil off. Serve up or pack in box.
Protip: Feel free to add other veggies or seasonings which you think would fit. [Spring] onions would work well.
Proteins: Vegetarians
If there’s something that even the best meat can’t do, it’s to add a touch of vibrant colour to the resulting bento. Thankfully this is managed by eggs, which are quick to whip up in a wide variety of ways.
If you’re health conscious, slices of hard boiled eggs add interest without the grease. For those among you who are suckers for cutesy stuff, some boiled quail eggs would probably be up your alley.
Personally, I have three favourite ways to cook eggs for bento. One is in the traditional Japanese style called “tamagoyaki”, a rolled omelette which is a staple in their cuisine – you’ll probably have seen slices or strips of it when dining in a Japanese restaurant. Unfortunately I haven’t quite mastered it yet, so I tend to fall back on the egg “mince” (“iri tamago/tamago soboro”) you see here. You’d be right in thinking that it’s scrambled egg gone past the “creamy” stage, but it’s an Asian favourite sans no cream/milk/butter. The recipe is provided below.
My final favourite? Pouring out a thin layer of egg on a frying pan, not unlike making an omelette. When it’s cooked, I remove the circular sheet of egg and leave to cool on a chopping board, then roll up and cut into fine shreds. (try garnishing your next noodle dish with this!) One egg, so many ways.
Then there’s the token Asian vegetarian protein: tofu. A few slices of the firm variety, lightly pan-fried on both sides with a drizzle of soya sauce –yum!
Iri Tamago/Tamago Soboro (egg mince)
Stir as much as you want depending on how “minced” you want the it to be.
Eggs (depending how much you want - don’t go more than 3!)
Light soy sauce
Dark soy sauce (adds colour, not flavour. OD and you get brown egg.)
Salt and pepper
Sesame oil
Cornstarch
Heat up a bit of the oil in a frying pan on medium-high while you lightly combine the eggs with sufficient seasoning (don’t use a heavy hand though!) Pour your egg mix in the pan, and stir as you would scrambled eggs - the only difference being you don’t have to stir as often if you want your “mince” to be a bit chunkier like I have in my bento. When you don’t see any wetness, the egg’s ready for serving or packing.
Protip: Adding a bit of chopped spring onions to the mix adds a nice pop of fresh colour.
Veggies
Like it or not, these “bad” boys are the main way you’re going to get your lunch to look interesting – they add pops of colour (apart from the fact that not having them means you run foul of the 5-a-day gamut.)
Again, you canmake life easier for yourself here. Pre-chop everything the night before – sometimes I’ll chop more peppers/carrots than I’ll need for the night’s meal and save the extra chopped veg for use in my bento the next day.
When time comes to cook them, you’ve got a good arsenal of methods at your disposal. Steaming or stir-frying is the best way to retain their nutrients – I’m biased towards the latter.
Now, a confession: the mixed veggies in the bento shown came straight out of a bag of frozen mixed veg. Before you go after myhead, though, hear me out – no one’s saying you CAN’T used frozen mixed veg. In fact, it’s inherently better than the pre-cut non-frozen as it’s frozen right after harvest and cleaning. Of course, I don’t recommend doing it all the time; but it’s perfectly acceptable in a pinch.
If you’ve got your veggies all chopped ready for a stir fry, here’s a simple basic method you can utilize and tweak. Heat up a bit of oil in your pan, then chuck in a bit of minced garlic before adding your veggies in. Put the longer-cooking stuff first; so for instance carrots would go in before pak choi. Add your seasoning while you stir-fry, taste to check, and remove when everything is done. One cardinal rule of stir-frying: NEVER overcook – you’re talking a few minutes, tops!
Treats
No reason to restrict yourself completely from having them – the key here is portion control, or using healthier alternatives. Sometimes if I’ve baked something like brownies, I’ll wrap a small slice and pack it in together with my bento box. On the other hand, my housemates will also testify that I buy clementines like there’s no tomorrow from North End Road market, which is another of my favourite “desserts” (it’s quite common for Asians to eat fresh fruit at the end of a meal in lieu of hot pudding). Sophia also swears by North End Road market as well, as that’s where you can find other fruits and veggies for dirt cheap.
Using Leftovers
There’s nothing stopping you from using leftover dishes to save time. I find that if I’ve made a bit too much stir fry or stew for dinner one night, it ends up with a fresh spot of rice as my lunch for the next day. Have some common sense, though; the “younger” the leftovers, the better. I’m not responsible for what happens if you pack that stew which seems to have developed a new ecosystem on its surface.
Should you end up including leftovers, make sure you heat it through until it’s piping hot to kill off whatever nasties have just begun to grow. Of course you can do this in the microwave; though that won’t kill the stuff on the surface unlike direct heating using a pan.
Packing and safety
If you’re using a thermal lunch container, make sure you preheat it following the manufacturer’s directions (boiling water for a few minutes?) and that your food goes in PIPING hot. Semi-warm food means that your food willstay at that temperature for ages, which is a lot better than current room temperature for nasties to grow.
Otherwise, if you’re using a non-thermal box sans dividers, start by packing your rice to one side. Compress it a bit with a moistenedspoon, then arrange your other components to fit the rest of the space, making sure there’s minimal room for movement. You’ll get better with time - sometimes I find myself stuffing a few boiled broccoli florets to fill in the gaps.
Now the important bit for non-thermal containers - make sure everything has sufficiently cooled down to room temp or just about. Condensation in lunchboxes is your enemy; the moisture that resultsdue to that is just an open invitation for bugs to breed on the inside. Don’t seal your container completely until you can be sure you’ve sufficiently minimized this!
Frills and fancies
You don’t have to make your lunch look uber-pretty – at the end of the day, your lunch’s going down the hatch so there’s no need to fuss around with various animal-shapped cutters or the like. However, if it’s not going to take more than a minute and you’re a closet crafter like moi, then by all means, arrange your food in whatever quirky way you want (like the smiley/frowney faces you see here. Just try not to handle the food too much with your fingers – use clean utensils (cocktail sticks are your friend for decorations like these.)
And that’s it – a really rudimentary insight on how to pack Asian style lunches/bentos. Hopefully those with “culinary yellow fever” will now have an excuse to prepare Asian home cooking to take with you into uni. Enjoy, and we hope you get on alright with your healthy eating plans!
_Editor’s Picks for bento resources, equipment and ingredients:
- The Just Bento Cookbook: Everyday Lunches To Go - Makiko Itoh
- Japan Centre, 14-16 Regent Street, SW1Y 4PH, japancentre.com
- Atari-Ya Foods (as per the famous sushi place), 7 Station Parade, Noel Road, West Acton, W3 0DS
- TK Trading, Unit 6-7, The Chase Centre, Chase Road, NW10 6QD_
Sample bento preparation timeline
It helps to practise - the first few times you make bento lunches, don’t be surprised if you’re a bit slow.You’ll soon pick up ways to shave minutes off the prep process. Here’s an example of what my morning would be like if I was prepping the bento shown and chopping meat/veg from scratch:
8.20: Take out pans, ingredients and utensils needed (utensils can be laid out the night before if desired - saves rummaging!)
8.22: Take precooked rice outfrom freezer, defrost in microwave (if I cooked it with a timed rice cooker, even better! Just pack and let cool.)
8.23: Cut up vegetables and chicken. Mix chicken with marinade.
8.27: Pack rice into bento box, let cool.
8.29: Stir fry meat and eggs at the same time in separate pans.
8.32: Take eggs out and put into bento box to cool with silicone cup divider. Wipe pan down with kitchen paper and stir fry vegetables (or bung in microwave!)
8.35: Take meat out, pack into box to cool.
8.36: Pack veggies into bento box with divider, leave to cool. Hunt for treats.
8.40: Close box properly, pop everything in backpack and head out for 9am class!


